Pizza is one of those dishes that instantly brings comfort to the table. The golden, slightly crisp crust, fresh tomato sauce, and flavorful toppings can transform any ordinary weeknight dinner into a small celebration. However, traditional pizza dough often contains a high amount of salt, which can be a concern for those monitoring sodium intake. That’s where low sodium pizza crust comes in — offering the same satisfying texture and flavor, with less salt.
This guide is for home cooks, health-conscious food lovers, and anyone who enjoys homemade pizza without compromising on taste. We’ll explore what makes low sodium pizza crust work, the key ingredients, step-by-step cooking methods, and tips for serving, storing, and customizing it. In my kitchen, I like to let the dough rest a little longer than usual; this gives it a subtle depth of flavor that makes each bite more enjoyable.
Whether you’re feeding a family, preparing meal-prep pizzas, or experimenting with healthier versions of your favorite recipes, this guide will walk you through everything you need to know about making low sodium pizza crust at home.
What Is Low Sodium Pizza Crust?
Low sodium pizza crust is a version of traditional pizza dough made with little or no added salt. While salt is typically used for flavor and to help activate yeast, low sodium recipes rely on natural fermentation and careful ingredient choices to develop flavor without excessive sodium.
Key Ingredients:
- All-purpose or bread flour
- Warm water
- Active dry yeast
- Olive oil (optional, adds richness)
- Sugar or honey (optional, helps yeast activate)
Historically, pizza dough comes from Naples, Italy, where simple ingredients like flour, water, yeast, and salt were transformed into soft, chewy, and flavorful crusts. Low sodium variations preserve this traditional approach while catering to modern health considerations.
The flavor of a well-made low sodium crust is mild but satisfying. The natural sweetness from fermentation and the nutty aroma of the flour create a dough that pairs perfectly with tomato sauce, fresh cheese, and toppings. Traditionally, dough is kneaded, allowed to rise, and baked at high heat to achieve a crisp exterior and tender interior.
Why Low Sodium Pizza Crust Works So Well
A low sodium pizza crust balances flavor, texture, and health-conscious cooking without compromising taste.
Flavor Balance:
- Less salt allows the natural flavor of wheat to shine
- Gentle fermentation adds a subtle tang that complements sauces and toppings
- Herbs, garlic, or olive oil can enhance umami naturally
Texture of Low Sodium Pizza Crust
- Crispy edges with a soft, chewy interior
- Proper rising and kneading create air pockets for lightness
- Even baking ensures a golden, slightly blistered surface for authentic texture
Nutritional Value:
- Reduced sodium supports heart health and blood pressure management
- Choosing whole grain or high-protein flour can boost fiber and nutrition
- Olive oil adds healthy fats without extra sodium
Cooking Techniques:
- Gradual fermentation enhances flavor
- High-heat baking ensures a crisp crust without extra salt
- Proper kneading develops gluten, improving chewiness and structure
Low sodium pizza crust fits into everyday meals because it works with nearly any toppings, sauces, and herbs, making it versatile for weeknight dinners or casual gatherings.
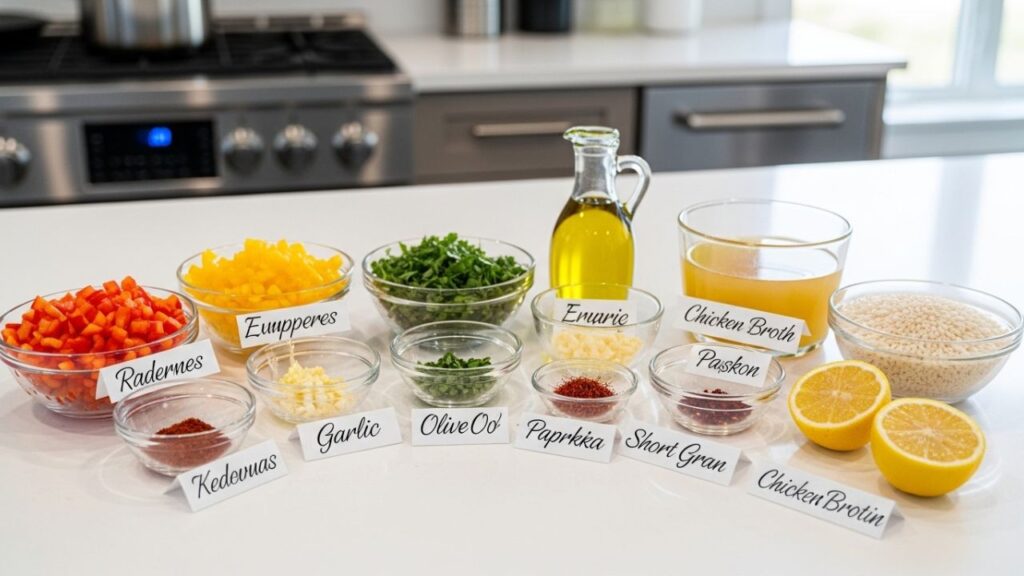
Key Ingredients for a Perfect Low Sodium Pizza Crust
The quality of ingredients is key to achieving a flavorful, low sodium pizza crust.
Freshness and Quality Indicators:
- Flour: Use fresh, unbleached flour with a slightly nutty aroma
- Yeast: Ensure it’s active and fresh for proper rising
- Water: Filtered or room-temperature water provides consistent texture
- Olive oil: Extra virgin olive oil adds subtle richness
Low sodium pizza crust ingredient substitutions
- Whole wheat or spelt flour for more fiber and a nuttier flavor
- Coconut sugar, honey, or maple syrup for natural yeast activation
- Plant-based oils for dairy-free or neutral flavor options
Seasonal Considerations:
- Cool months may slow yeast activity; use warm water and allow longer rising
- Summer humidity may make dough stickier; adjust flour as needed
- Adjust hydration depending on seasonal flour moisture content
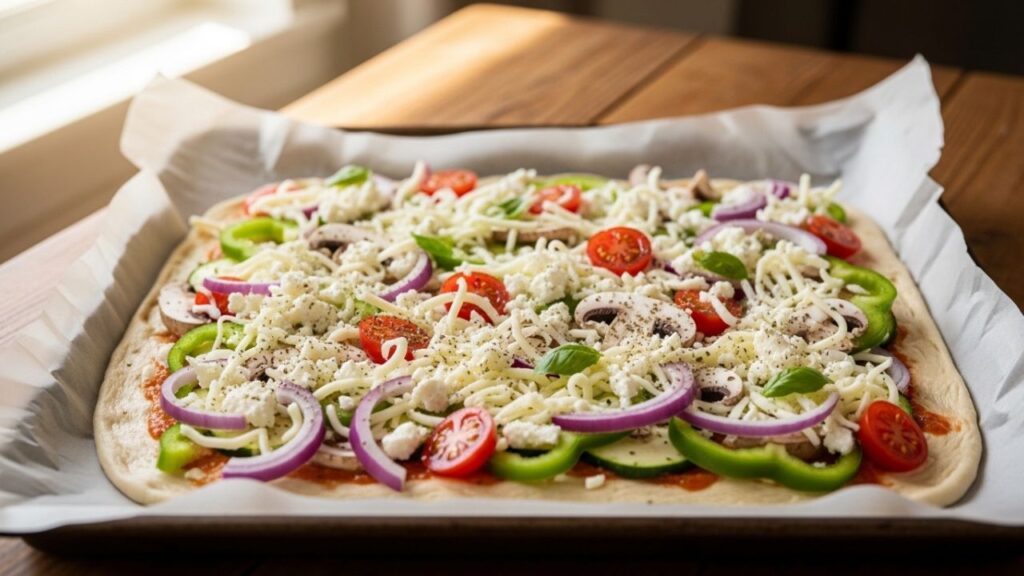
Homemade low sodium pizza crust ready to bake
- Standard all-purpose flour works perfectly for most crusts
- Regular granulated sugar instead of honey is sufficient for yeast activation
Pantry Staples That Enhance Flavor:
- Dried oregano, basil, thyme
- Garlic or onion powder for subtle aroma
- Olive oil for brushing the edges before baking
How to Make Low Sodium Pizza Crust Easy Method
Making a delicious low sodium pizza crust at home is simple if you follow the right steps. This method focuses on texture, flavor, and proper rising to ensure a golden, tender, and slightly chewy crust every time.
Ingredients (for 1 medium pizza crust)
- 2 ½ cups all-purpose flour
- 1 tsp sugar
- 1 tsp active dry yeast
- 1 cup warm water (100–110°F / 37–43°C)
- 1 tbsp olive oil
1. Activate the Yeast for Low Sodium Pizza Crust
In a small bowl, mix the yeast, sugar, and warm water. Let it sit for 5–10 minutes until it becomes foamy. This indicates the yeast is active and ready to help the dough rise.
2. Mix the Dough for Low Sodium Pizza
In a large mixing bowl, combine the flour with the yeast mixture. Add the olive oil and stir until the dough begins to form. It should start coming together in a sticky mass.
3. Knead the Dough
Transfer the dough to a lightly floured surface. Knead for 8–10 minutes until it is smooth, elastic, and slightly tacky. Kneading develops the gluten, giving the crust its chewy texture.
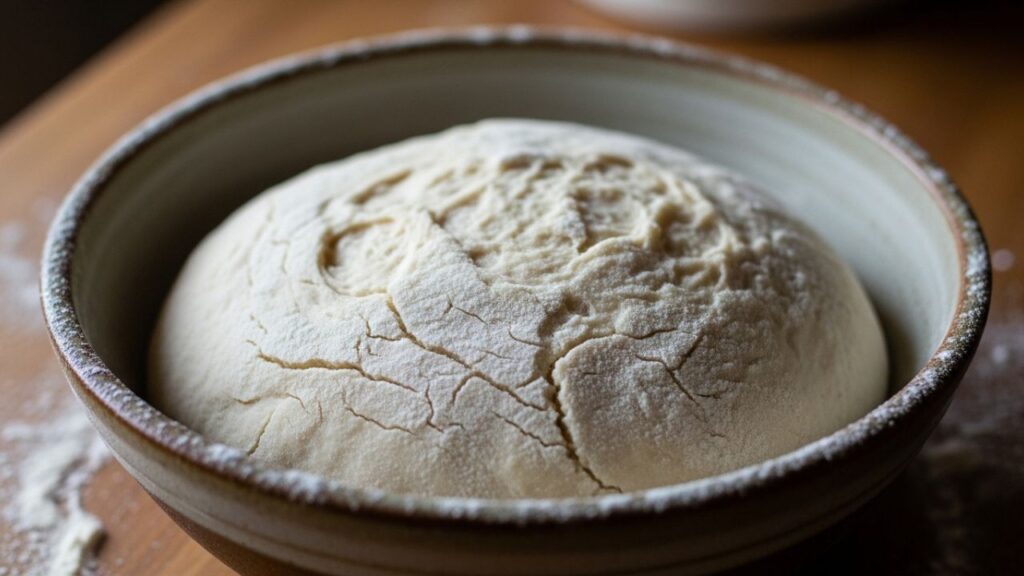
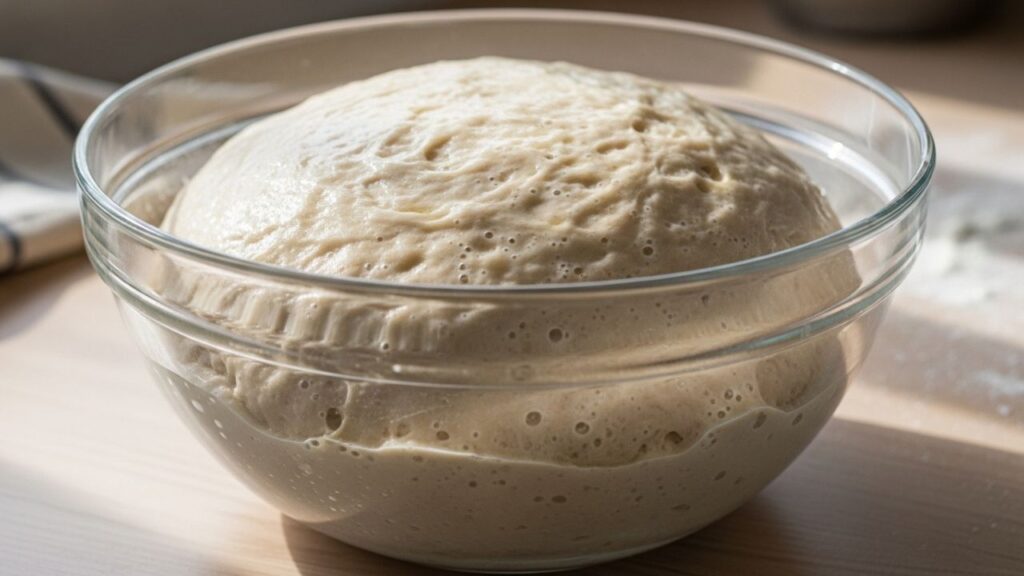
4. First Rise
Place the dough in a lightly oiled bowl and cover it with a damp kitchen towel or plastic wrap. Let it rise in a warm area for 1–2 hours, or until it doubles in size. Slow fermentation adds flavor even without added salt.
5. Shape the Dough
Punch down the risen dough to release any large air bubbles. Roll or stretch it gently into your desired pizza shape — round, rectangular, or freeform. Avoid pulling too hard to prevent tearing.
6. Second Rise (Optional)
For a lighter, airier crust, let the shaped dough rest for another 20–30 minutes before adding toppings. This helps create a crisp exterior while keeping the inside soft.
7. Bake the Pizza
Preheat your oven to 475°F (245°C). Add your favorite sauce, cheese, and toppings. Bake for 12–15 minutes, or until the crust is golden brown and slightly crisp.
Sensory Cues
- The dough should feel soft and springy before baking.
- A properly baked crust sounds slightly hollow when tapped.
- The crust should have a light golden color with slightly crisp edges.
Troubleshooting Tips
- Sticky dough: Sprinkle a little more flour, one tablespoon at a time.
- Dry dough: Add warm water gradually, a teaspoon at a time.
- Dense crust: Allow more time for the first rise.
- Dough tearing while stretching: Let it rest for a few extra minutes to relax the gluten.
Optional Variations
- Mix finely chopped herbs like oregano, thyme, or rosemary directly into the dough for extra flavor.
- Substitute part of the flour with whole wheat or spelt flour for a nuttier, more fiber-rich crust.
- Brush the edges lightly with olive oil before baking to enhance browning and add richness.
How to Serve Low Sodium Pizza Crust
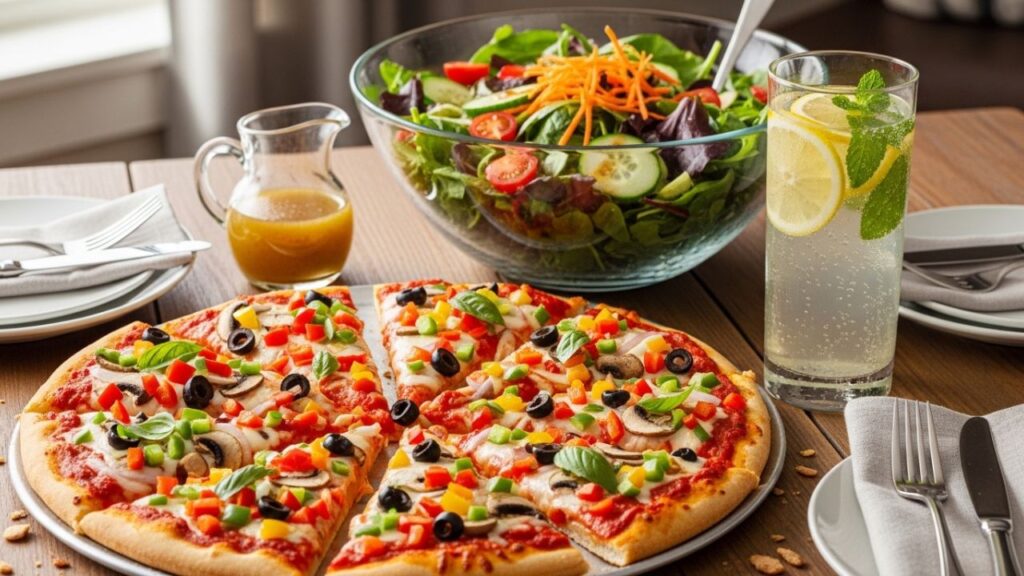
A low sodium pizza crust is versatile and serves as the perfect base for a wide variety of toppings, sauces, and accompaniments. Whether you’re preparing a casual weeknight meal, a family dinner, or a gathering with friends, thoughtful serving choices can elevate your pizza experience.
Ideal Toppings and Pairings
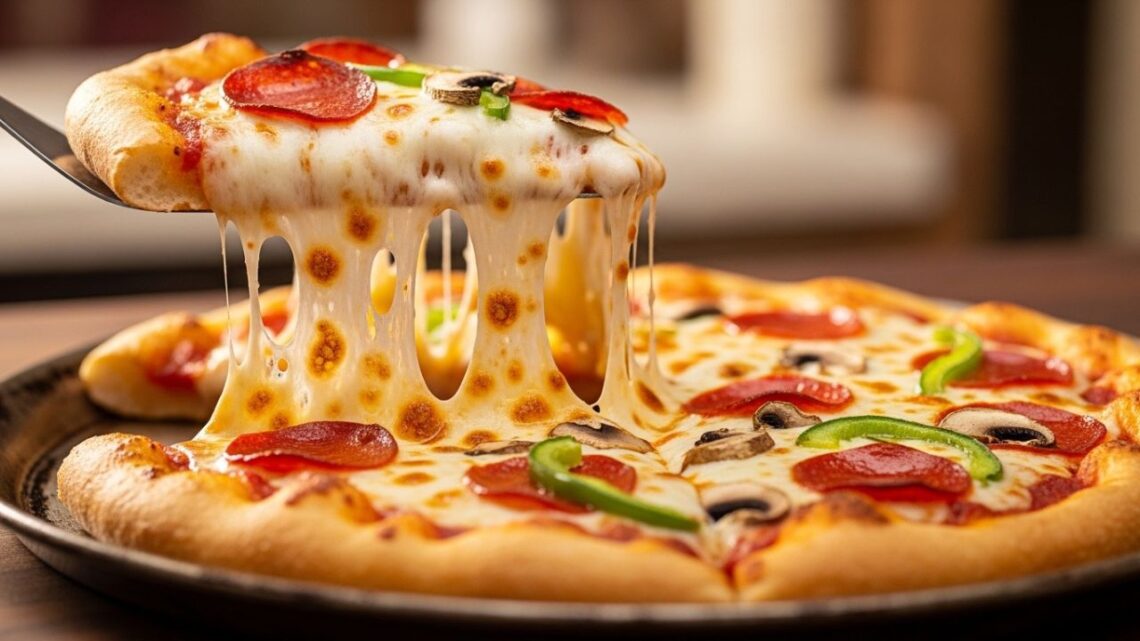
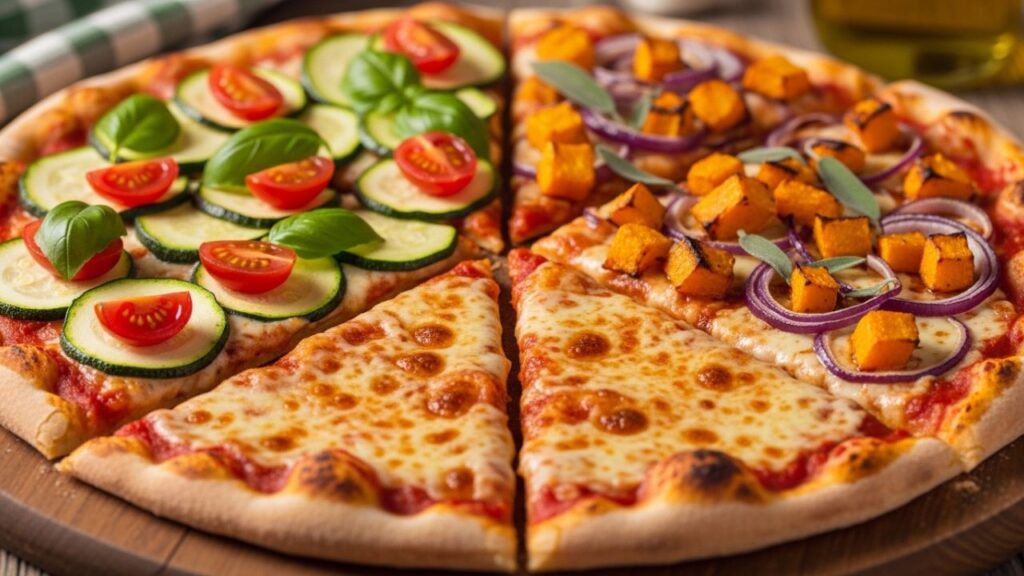
- Classic Margherita: A timeless combination of fresh tomato sauce, creamy mozzarella, and fragrant basil. The simplicity lets the crust shine while keeping flavors balanced.
- Mediterranean Twist: Roasted vegetables such as zucchini, bell peppers, and eggplant paired with tangy goat cheese make for a fresh, lighter pizza option.
- Protein Boost: Lean meats like grilled chicken or turkey slices add substance without overpowering the crust’s delicate flavor.
- Kid-Friendly: For little ones, stick to simple toppings like cheese or pepperoni with minimal extras, allowing the dough and sauce to stand out.
Plating and Presentation Ideas
- Slice pizzas into thin triangles for easy sharing at parties or casual meals.
- Serve on wooden boards or pizza stones to give a rustic, inviting presentation.
- Enhance the visual appeal by adding a drizzle of olive oil or balsamic glaze before serving. Fresh herbs like basil or parsley also add color and aroma.
Portion and Serving Tips
- For lighter meals, half a medium pizza per person is often enough.
- Adjust topping quantities depending on whether you’re serving a family, a small group, or an individual meal.
- Pair your pizza with fresh salads, roasted vegetables, or light soups to create a balanced plate that complements the low sodium crust.
Extra Ideas for Gatherings
- Create mini pizzas with different toppings to let guests customize their slices.
- Use leftover crust for pizza sandwiches or paninis the next day.
- For festive occasions, try seasonal toppings such as roasted pumpkin in fall or fresh tomatoes and basil in summer.
Low Sodium Pizza Crust for Special Times of the Year
Spring/Summer: Fresh tomato, zucchini, basil, or fresh corn
Fall/Winter: Roasted root vegetables, caramelized onions, mushrooms
Holiday or Casual Meals: Mini pizzas for gatherings, themed toppings like roasted pumpkin or cranberries
Leftover Ideas:
- Toast slices for breakfast or snacks
- Use as a base for pizza paninis
- Chop leftover pizza for a salad topping
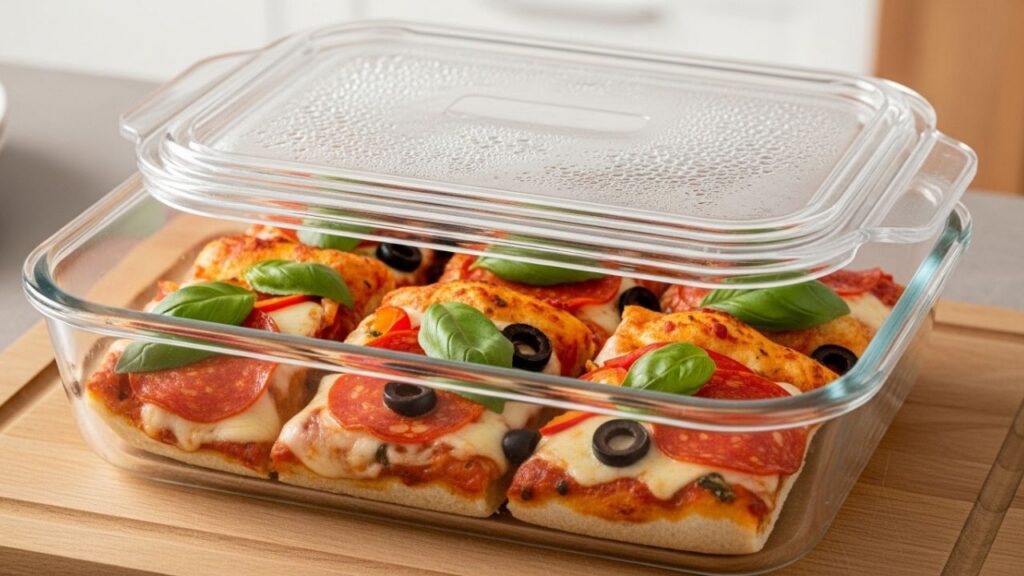
Storage and Reheating Tips for Low Sodium Pizza Crust
Proper storage and reheating are key to keeping your low sodium pizza crust fresh, flavorful, and perfectly textured. With a few simple steps, you can enjoy your homemade pizza over several days without sacrificing taste or quality.
Storing Raw Dough
- Refrigeration: Place leftover dough in a lightly oiled, airtight container or wrap tightly in plastic wrap. Refrigerate for up to 3 days. Chilling the dough slows yeast activity while enhancing subtle flavors.
- Freezing: For longer storage, wrap the dough tightly in plastic wrap and then place it in a freezer-safe bag. It can last up to 2 months. When ready to use, thaw overnight in the refrigerator before shaping.
Storing Baked Pizza
- Let the pizza cool completely before storing to prevent condensation and sogginess.
- Place slices in an airtight container or wrap individually in foil or plastic wrap. This keeps the crust from drying out and preserves freshness for 2–3 days in the fridge.
- Separate layers with parchment paper if storing multiple slices together.
Reheating in the Oven
- Preheat the oven to 350°F (175°C).
- Place pizza slices on a baking sheet and heat for 5–7 minutes, or until warmed through.
- For a crispier crust, consider using a pizza stone or wire rack to allow air circulation underneath.
Reheating on the Skillet
- Heat a non-stick or cast-iron skillet over low heat.
- Place slices in the skillet and cover with a lid to trap heat.
- Heat for 2–3 minutes per side, checking frequently to avoid burning.
- This method helps restore a crispy crust and melty cheese without drying it out.
Food Safety Tips
- Never leave raw dough at room temperature for more than 2 hours to prevent bacterial growth.
- Store baked pizza slices in airtight containers promptly to maintain freshness and prevent contamination.
- When thawing frozen dough, always do so in the refrigerator rather than at room temperature.
Additional Tips for Best Results
- Avoid reheating pizza in the microwave if you want to retain crispiness; it tends to make the crust chewy and soggy.
- For leftover dough, you can also make mini pizzas or calzones — a fun way to repurpose dough while keeping meals interesting.
- Brush edges with a tiny bit of olive oil before reheating to enhance flavor and color.

Low Sodium Pizza Crust Mistakes You Should Avoid
- Overcooking or undercooking: Watch for golden edges and a firm bottom to avoid burning or soggy crust.
- Skipping resting time: Dough needs sufficient rising to develop flavor and texture.
- Incorrect seasoning balance: Even low sodium pizzas benefit from herbs, garlic, and olive oil for taste.
- Poor ingredient preparation: Ensure yeast is active and flour is fresh for proper dough.
- Texture issues: Adjust flour and water ratios for a smooth, elastic dough.
- Rushing kneading or stretching: Not kneading enough can result in dense, tough crust; rushing stretching can tear dough.
Frequently Asked Questions
1. Can I make this pizza crust gluten-free?
Yes, you can use a gluten-free flour blend along with xanthan gum to achieve elasticity and structure similar to regular dough.
2. Can I freeze the dough before baking?
Absolutely. Wrap it tightly and freeze for up to 2 months. Thaw overnight in the refrigerator before shaping and baking.
3. How can I add more flavor without salt?
Herbs, garlic, olive oil, or light cheese toppings enhance taste naturally without increasing sodium content.
4. Does the crust stay crispy without salt?
Yes, if baked at high heat and properly proofed, the crust will remain crisp while maintaining a chewy interior.
5. Can I use whole wheat flour entirely?
You can, though the crust may be denser and nuttier. Mixing half all-purpose flour ensures a lighter, more flexible dough.
6. How long should the dough rise for best results?
Allow 1–2 hours for the first rise, with an optional 20–30 minutes for a second rise to improve lightness and flavor.
Conclusion
Low sodium pizza crust proves that you can enjoy flavorful, satisfying pizza without compromising health. Careful ingredient choices, proper rising, and thoughtful baking create a crust that’s golden, tender, and full of subtle flavor. Focusing on balance — natural sweetness, gentle fermentation, and complementary toppings — ensures a wholesome and delicious pizza every time.
Preparing your dough thoughtfully turns pizza night into a cozy, intentional meal. Whether for weeknight dinners, casual gatherings, or personal indulgence, this guide ensures your low sodium pizza crust will always be a success.
About the Author
Jane Thompson is a passionate home cook and food writer who loves creating healthier versions of classic dishes. She shares approachable recipes and practical tips to help readers cook flavorful meals at home. When not in the kitchen, she experiments with seasonal ingredients and documents her culinary adventures for fellow food enthusiasts.